Week 1 Task 1 24/01/11 - Sound implementation - Squash & Stretch methods.
This was my first introduction to animation. Here I was made familiar with Adobe Flash CS5. We were then lectured on the interface of Adobe Flash and the relevance of ‘Time’ when creating visually in Adobe Flash. We were also shown a physical example of how time and gravity operate when dropping a ball/object of varying size and weight from a set height. I worked on learning squash and stretch the most.
Then within Adobe Flash we replicated this by created three circles on the 2D canvas, setting key frames and motion tweens, and then placing the circles correctly. I struggled with applying key frames at the right time and always ended up with balls falling out of place, but I fixed this quickly by being my accurate. We learnt that when we dropped the plastic balls, they all fell at the same speed while descending, but after the first collision they all rebounded at different rates of velocity; this was because of the varying size, weight and density of the balls.
I love this software because after learning the basics you can really create some visually interesting animations with not much work at all. The onion skinning tool helped me a lot when trying to visually see what was happening within the animation. I was tasked to animate a ball using the sound captured from a real life ball colliding with the ground.
Week 2 Task 2 31/01/11 Arcs & paths - 2 Balls Arcing/following a path
This week we were introduced to deformation and how this is vital when animating. We learnt about the change in size and structure of muscles and metal when 3D models are in motion. I was also introduced to Muybridge. I found this person to be extremely interesting. After lecture I went home and spent a night learning about his history and what he achieved in his life. I cant believe that he has such an impact on photographic animation and that a very high number of people still use his work as reference now instead of doing it themselves, I find him extremely clever to come up with this idea first. Here I tried to really get used to arcs and paths of the circles/balls.
This week within Flash CS5 we learnt about volume within the 2D circles we were animated. We learnt how to alter the circles size using the manipulator tool while selecting the correct key frame so that the animation then appeared smooth flowing. At this point I started to become more adventurous with what I had learnt so far and started to try and animate the circle to run along different pathways. I found out that I only needed to change the circle size slightly when it's at its slowest and the opposite when its at its fastest for example, at the highest point of impact.
Week 3 – 07/02/11 - To create 1 ball and 3 Bouncing balls of varying characteristics. With an additional coloured background if I can. Key Frames below.
Ball In Maya Include here. Two different types.
Include 5 Key Frame shots - AVIS -Research -
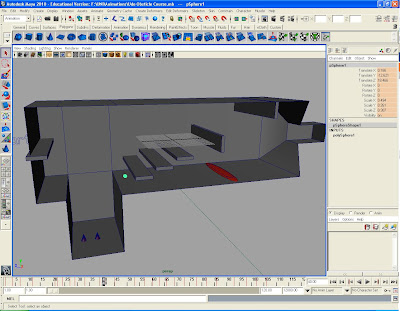
Week 4 – 14/02/11 - Maya Ball Obstacle Course
Week 5 - 21/02/11 - Last Week I was introduced to how to build a Maya leg rig in which I shall then use to learn how to create a rig that jumps. I created it with bones / applied IKs and Controllers for such: - then later I will use this in week 6 I think which is the jump rig week.
Progression Screen shots below - Key Frame Shots.
Week 6 - 28/02/11 Maya Jump Rig -
First Attempt - Below.
Week 7 - 07/03/11 - Introduction to Walk Cycle
Research: links
Idea: A walk - Then a walk along a wall balancing.
Plan: Plan it in PHS
Walk Key frame shots below.
Walk cycle 4-5 Key frame Shots of the first Cycle -

Week 8 - 14/03/11 - Clinic - Walk Cycle- Re covering Ball animation MEthods
Remember to Key at the start 1 then 2 before in the air changing shape. then 4th squish on ground then 5th main contact then back t 6th then 7th and 8th then back to same height as start 9th. the Keys around contact willl be closer than the falling ones at top.
http://www.lutmananimation.co.uk/Rigging_WS/Rig_intro_1.htm
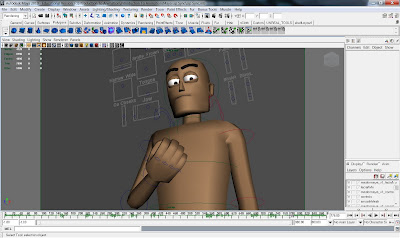
Lip Sync - 5 Key frame Screen shots - Below.
Reserach - http://minyos.its.rmit.edu.au/aim/a_notes/dope_sheets.html
http://www.stopmotionworks.com/mischtml/stopmolog.htm
Week 9 - Lip Sync Planning.
My Dope sheet Screen shot below - lip poses and lip sync.
To view the whole - Dope Sheet - For the lip sync. Please refer to the ''300DopeSheet'' Excel document on the Introduction to Animation CD. This applies for anything else you would like to view in detail. It is included on the CD.
Lip Sync Sound - Referenced from www.wavplanet.com
Week 10 - Finishing all my animation - Plus Lip sync
Week 11 - Study of emotional figure poses and polishing off animation.
Week 12 - Studying the History of Animation
For example - http://en.wikipedia.org/wiki/Eadweard_Muybridge
6 Figure Poses -
Observational Research -


 Reference images derivied from www.google.com